Showing posts with label bags. Show all posts

Sunday, March 20, 2022

Sea Bags

Working on items to restock for next winter for weeks and weeks now... need a change of pace ... decided to do something fun..

I have been gearing up to make bags have ideas for so many it was hard to pick where to start lol.. with my sewing area under works i was able to narrow it down a bit.. 
got a few base bags done and now adding to them..


                             picked up some patterns to start me off on applique work from  Raverly, Etsy and YouTube  ... didn't take long to decide to switch to free form.. got a few really good tips along the way so worth the price and time


I picked up a few cutting mats from the Dollar Tree awhile back for my cutting table.. tapped them together.. works great and was able to fit it to my table.. planning on adding a few more as things move on with my sewing area.. in the mean time I am using one slid into the bag to make seaming down so much easier..


Friday, December 31, 2021

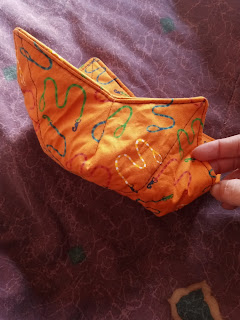
Fabric bowl


My dog has a hard time eating from a solid bowl.. his nose is longer than the rest of his snout .. he is of a good size so most kibble is small enough to get in his nose.. 

 I saw a microwave bowl cozy.. this could work for both sending hot foods over to my parents house nextdoor and my dog.. made one for doggie first figuring I could tweet the pattern for my parents cozies in the process.. being 100% cotton shrinkage is going to play a part in overall size..

Had a few extra minutes the other day so put a simple 10 by 10 inch two layers of outer fabric and two of batting .. darts were 1 inch long by 2 deep ... used a cute dog lead fat quarter..

He loves it.. eating without any issues.. even asked for more.. will post a update with overall instructions after I get sizing worked out better. 

Sunday, December 6, 2015

Free reindeer pouch pattern

When I first starting crocheting I signed up for email from All free crochet patterns ( see link ) I have found some really cool patterns this way and learned a lot...
All free crochet patterns

When they sent a link for this one I had to give it a go..
Reindeer pouch

I didn't have dark brown yarn for the antlers so went with tweed.. made them with 2 strands held together.. also added a strap ( 2 single crochets ) .. very quick fun pattern :D


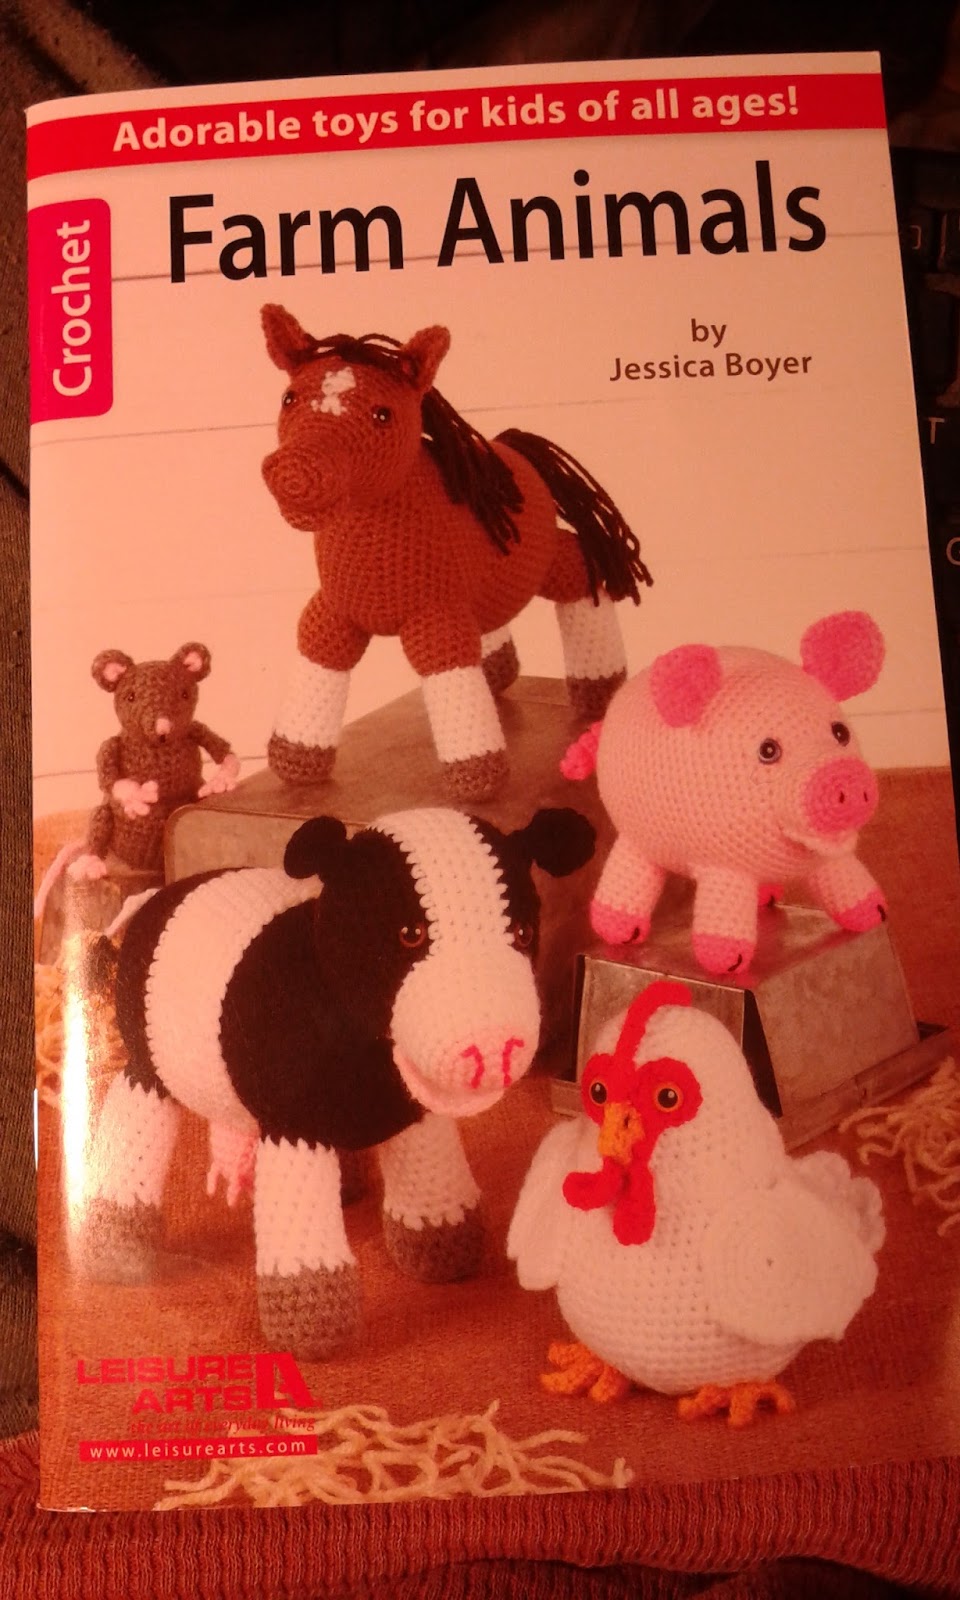
As I wanted to make more reindeer patterns I really needed to find some dark brown.. I almost gave up again after trying 3 times... I found some stuck in back of the bottom rack ( had to get on my knees and reach in the darkness.. lol ) at Joann's.. on sale :D that meant I still had my 60% off coupon to use :D :D  I had been sent there to get myself something for our 31 anniversary ( I really prefer it this way.. I get what I want without spending a lot... double win ) always loved stuffed animals when I saw this booklet it had to come home.. going to get started on it soon as I get one more reindeer done as I now have that dark brown yarn... life is good  

Saturday, August 23, 2014

More crochet drawstring bags


I just love little bags... they are so much fun to make, have so many uses... can be worn around your keck on your belt, hang in your car or any place for that matter... I charge many with reiki energies, by doing so you can send reiki to some one by writing down their name on a slip of paper and placing it in the bag... charge crystals or other small items...
I'm planning on selling a few these reiki charged bags at a up coming fair. I've been making them out of many types of yarn. So far this is my favorite pattern for crocheting them... they can be made in any size by adding more increases at the start of the pattern as well as adding rows...

here is the basic idea...

single crochet 8 times in a magic circle, slip stitch join

chain one, single crochet into base of last stitch, single crochet twice into each stitch

(    if a larger bag is wanted
 *single crochet twice into next stitch, single crochet one stitch* repeat to end
 *single crochet twice into next stitch, single crochet two stitches* repeat to end
 *single crochet twice into next stitch, single crochet three stitches* repeat to end     )

 single crochet all stitches until you reach the size you like

to make the area where the drawstring is threaded through do a round of twisted double crochet join with a slip stitch

chain two, *single crochet, chain one* repeat to end slip stitch to join and fasten off.

I made a simple chain stitch cord for the drawstring, weave it through the space created by the twisted stitches
I added beads to some charms to others :)

these are very similar to my other drawstring bag crochet pattern.. the difference being the way the area for the drawstring is constructed...
you can find that pattern here 
drawstring bags

Sunday, June 22, 2014

Cotton crochet sachet

I'm not a fan of canned "air fresheners"
I do love the smell of many herbs and flowers and making bags :D
with bits of end pieces of cotton I put this small very quick and simple
sachet together 
for use in my car
 
 
I used a size H US hook and a few yards worsted weight cotton yarn... I put it on a hook style key chain with a button closure... it's made so it doesn't close tightly on top but can hold a couple of crystals while hanging from my dashboard..

this pattern can be made to any size you'd like using whatever hook and yarn you have laying around... just keep the stitches loose enough to let a bit of air flow through but not so loose the your crystals pop out :D

I chained a few stitches ( any number you like to get the width needed ) for the foundation, double crochet ( dc ) into the second chain from the hook, dc until you reach the first chair stitch, dc 3 times into that stitch going around to the other side of the foundation row, dc to the end of those chain stitches, dc into the last one 3 times... from there dc all stitches until you reach the size you want.. dc haft the stitches turn ( making sure you are at the start of a new round ), dc half of those stitches ( so 1/4 of over all stitches )  chain enough stitches to go around your button, dc to end of row fasten off.... if you'd like a longer flap add a few more rows of dc's before making the chain stitches for the button closure... weave in ends, sew on button, either make a chain cord to hang form or add a key chain hook... add a charm or 2... I added a silver feather to this one    


Tuesday, June 17, 2014

Drawstring bags

I picked up some yarn on clearance... wasn't sure what I was going to do with it but I'm a sucker for clearance sales especially when they are 50% off :) .... 2 them were from Lion Brand came with a pompom and pattern for a hat.... at $3. each I thought why not, looks fun
 
...until I checked out the web page and found the corrections... one skein would make a hat but only in small sizes for young children.. the pompom is about the size of a orange.. couldn't see putting that on a small child's hat and expect it to stay on the poor kid..
now I did have 2 skeins, I could have used it to make one hat but after reading the pattern I didn't like it... this wasn't sounding fun any more...
for me crafting is about fun.. I have fun making things... fun either gifting or selling them.. fun coming up with quick easy patterns I can share with others here on my blog... to make some thing I didn't find fun I can only imagine would leave it not feeling... well fun
 
So funky yarn plus fun factor... for me that turned out to be making a couple of drawstring bags with one of the skeins :D
The first is a simple straight stitch knit bag using size 5 dpns ( set of 4 )
cast on 9 place on 3 dpns join
1) knit front and back of all stitches
2) knit all stitches
3 and 4) as rounds 1 and 2
5 - 31) knit all stitches
32) knit 2 together, yarn over repeat to end
33) knit one, knit front and back of the yarn over stitch, repeat to end
34) bind off, weave strand of yarn through the yarn over openings for drawstring. 


the second bag is a little bigger done in crochet.. with a shell stitch top

using a size G hook
1) single crochet 8 times in a magic circle
2) single crochet twice into each stitch
3) *single crochet twice into next stitch, single crochet one stitch* repeat to end
4) *single crochet twice into next stitch, single crochet two stitches* repeat to end
5) *single crochet twice into next stitch, single crochet three stitches* repeat to end
6 - 26) single crochet all stitches
27) chain one, skip one stitch double crochet 5 times into next stitch,    *chain one, skip two stitches double crochet 5 times into next stitch* repeat to end.. join in first chain stitch of round, fasten off.
I made a simple chain stitch cord with the yarn left over for the drawstring, weaving it into the bottom of the shell stitches

I didn't worry about gauge or counting yardage but the skein is 2.3 oz with 98 yards of medium weight

Still no clue of what to do with the rather large pompom.... maybe a cat toy.... 


Friday, June 13, 2014

Simple crochet phone cozy with beaded dragonfly


This cozy/bag is very simply crochet with seed beads sewn on the back in the shape of a dragonfly...

I used a "G" hook and a few scrap yards of worsted weight in Red Heart's Honeydew color way ... one 3/4 button and a handful of random sized bugle and seed beads ... the bag is about 3 inches wide and 5 inches tall  

1) chain 4 join with a slip stitch into the first chain to form a circle
2) single crochet 10 times into circle
3) single crochet twice into each stitch ( 20 stitches )
4 - 19) single crochet 20
20 - 26) single crochet 10 turn
27) single crochet 4, chain 5, skip 2 stitches, single crochet 4 fasten off, weave in ends. Sew on button and beads use photo for bead placement.


Saturday, April 26, 2014

Draw string crochet pouch


Draw string crochet pouch

I used worsted weight scrap yarn for this bag, changing color often, I listed where I changed colors in this pattern but colors can be changed at any end of round. I didn’t keep track of the amounts of yarn used, however it wasn’t much of each.

Exact gauge is not essential to this project, I used a size G ( 4,25 mm ) hook for the pouch and K ( 6.50 mm ) for the draw string.

Each instruction for individual rounds are listed by number until the bottom center where you will continue until bottom is closed.

I’m sure you can use any stretchy foundation stitch you like, I found this one to be easy to do with a nice look…

Foundation stitch

Chain 2, insert hook under top 2 loops of second chain from hook, yarn over hook and pull up a loop, yarn over hook and pull through one loop on hook, yarn over hook and pull through 2 loops on hook ( first foundation stitch made ), * insert hook under top 2 loops of chain at the base of previous foundation stitch, yarn over hook and pull up a loop, yarn over hook and pull through one loop on hook, yarn over hook and pull through 2 loops on hook repeat from * for a total of 38 times

After completing the foundation join together to form a ring with a slip stitch ( all rounds are joined with slip stitches )

1 - 2 ) chain 1, single crochet to end of round

3 ) using new color chain 2 ( counts as first double crochet ), double crochet into base of first chain just made, chain 1, skip next chain, * double crotchet twice in next chain, chain 1, skip next chain* repeat to end ( this round makes the openings for the draw string )

4 - 5 ) chain 1, single crochet to end of round

6 ) change color chain 2, double crochet to end of round

7 ) chain 1, single crochet 3, skip 1 chain, * single crochet 4, skip 1 chain * to end of round

8 - 9 ) chain 1, single crochet to end of round

10 ) change color chain 1, single crochet 2, skip 1 chain, * single crochet 3, skip 1 chain * to end of round

11 ) chain 1, single crochet to end of round

12 ) chain 1, single crochet 3, skip 1 chain, * single crochet 4, skip 1 chain * to end of round

13 ) chain 1, *single crochet 1, skip 1 chain * repeat without slip stitching between round until bottom of bag is closed, fasten off.

Weave in ends, closing slight gap in foundation and bottom with tail ends.

Using 3 strands of yarn and larger hook make a chain cord long enough to weave through openings for draw string.

If you find any issues with this pattern please feel free to leave a comment informing me :D oh other than it being fully written out instead of abbreviations lol I’ll start using them when I get the hang of crochet a bit better :D


Sunday, August 14, 2011

Reiki bags

A easy way of sending distant Reiki is also a quick knit :D If you have Reiki add when knitting this bag, if not get someone with Reiki to send some energies after you finish the bag :D
To use place a charged crystal or stone in it ( intend it to send healing Reiki energies ) add names on slips of paper of who you would like to send to.

This is a loose knit bag, and works well with hanging of herbs.

Don't worry about gauge, needle size or anything lol grab some yarn and whatever you would like to add..... beads are great ;)


Size 6 US dpns or straight either way
K = knit
Sl 1 = slide one stitch purl wise
Yb = yarn back
Yf = yard forward
Yo = yarn over the needle to make new stitch
Cast on an odd number. I used 11 stitches for the purple one and 13 for the eyelash, as long as the count is odd your good to go.
1) *K1, Yf, Sl 1, Yb* to end
2) Sl 1, * K1, Yf, Sl 1, Yb * to end
Continue in this manner until you reach the size you want.
Slide every other stitch on two dpns or stitch holders……. next place them in the proper position to begin knitting again

K1, Yo to last st. k1
Bind off, weave in ends.
Cord
I made a simple crochet chain stitch of varying lengths for each. Some I used plain yarn, just threaded through…..add some beads.....mix it up to create your own look:D

Monday, December 6, 2010

Small gift bag

I've been making more smaller gifts, necklaces, ear rings and the like. So another bag was in order. It is on the small size.
Hangs great on trees :D


Small gift bag

2 by 2 1/2 inches
Size 4 US needles dpns or cable needles
exact gauge is not essential to this project
about 8 yards of 100 % cotton worsted weight
 
k = knit
k1 tbl = knit 1 stitch through the back loop
k2tog = knit 2 stitches together
k3tog = knit 3 stitches together
yo = yarn over needle

Cast on 6 stitches, join in the round

1 ) * k1, yo * to last stitch, k1
2 ) * k1, k1 tbl * to last stitch, k1
3 ) * k1, yo * to last stitch, k1
4 ) * k1, k1 tbl * to last stitch, k1

Knit 12 rounds

Yo * k2tog, yo * to last 3 stitches, k3tog

Bind off.

Weave in ends.
 
Make cord as long as you like. Mine is about 9 inches. Made with a crochet chain stitch, using a size G hook.
Weave cord through the yo’s, start with the first yo made. You end up with the k3tog between the cords to add strength.
 

Wednesday, November 17, 2010

Tiny hemp bag for crystals


I wanted to be able to carry a few small crystals, without misplacing them :D So just a very quick bag. Great for using up end pieces of yarn.

Tiny hemp bag for crystals

Size 4 US needles dpns or cable needles
3 inches tall by 2 inches wide
5 ½ by 7, however exact gauge is not essential to this project

1 ½ yards Raspberry
5 yards Black
14 yards Gray
All yarns are 100 % hemp sport weight

Bk k1 = knit one stitch using black yarn
G k1 = knit one stitch using gray yarn
k = knit
kf/b = knit into the front loop and back loop of next stitch ( making 1 new stitch )
k2tog = knit 2 stitches together
R k1 = knit one stitch using raspberry yarn
R p1 = purl one stitch using raspberry yarn
yo = yarn over

Cast on 4 stitches using gray yarn

1 ) knit
2 ) kf/b all, join in the round
3 ) knit
4 ) * kf/b 1, k1 * to end
5 ) * k1, kf/b 1, k1 * to end
6 ) * k3, kf/b 1 * to end

Knit 7 rounds

Add black yard

*G k1, Bk k1* to end
Repeat last round

Cut gray yarn, add raspberry yarn
* R k1, Bk k1 * to end
Repeat last round

* R p1, Bk k1 * to end

Cut raspberry yarn

Knit 2 rounds ( using Black yarn )

* k2tog, yo * to end

Knit 1 round.

Bind off.
Weave in ends.
 
Make cord as long as you like. I kept it short at 9 inches.
I made mine with a crochet chain stitch, using a size H hook, in the black yarn.
Weave cord through the yo’s, for drawstring.
 

Sunday, December 20, 2009

Knit and Cable Hand Bag

I came across this cable pattern in a Harmony Guide, and wanted to give it a try.


Knit and Cable Hand Bag
Knit flat, seamed up the sides with cabled flap. Hooks or snaps hold closed, with ornamental button.
5 ½ by 9 inches
Size 6 US needles
Cable needle
Yarn needle for seaming
105 yards worsted weight yarn ( pictured in Real Teal by Redheart )
Two snaps or hooks
1 button ( optional )
Exact gauge is not essential to this project
Stitches
C4f = slide 2 stitches onto cable needle hold on front side of work, knit 2 stitches then knit the 2 stitches on cable needle
C4b = slide 2 stitches onto cable needle hold on back side of work, knit 2 stitches then knit the 2 stitches on cable needle
K = knit
P = purl
T3b = slip one stitch onto cable needle hold in back, knit the next 2 stitches, purl the stitch off the cable needle, for a twist to the right.
T3f = slip two stitches onto cable needle hold in front, purl the next stitch, knit the 2 stitches off the cable needle, for a twist to the left.
( )x = repeat directions inside brackets as many times as indicated
 
Cast on 36 stitches
1) purl
2) knit
3) p10, ( c4f, p2 )x 2, c4f, p10
4) k10, ( p4, k2 )x 2, p4, k10
5) p9, ( t3b, t3f )x 3, p9
6) k9, p2, ( k2, p4 )x 2, k2, p2, k9
7) p8, t3b, ( p2, c4b )x 2, p2, t3f, p8
8) k8, p2, k3, p4, k2, p4, k3, p2, k8
9) p7, t3b, p2, ( t3b, t3f )x 2, p2, t3f, p7
10) k7, p2, k3, p2, k2, p4, k2, p2, k3, p2, k7
11) p6, ( t3b, p2 )x 2, c4f, ( p2, t3f )x 2, p6
12) k6, ( p2, k3 )x 2, p4, ( k3, p2 )x 2, k6
13) p5, ( t3b, p2 )x 2, t3b, ( t3f, p2 )x 2, t3f, p5
14) k5, ( p2, k3 )x 2, p2, k2, ( p2, k3 )x 2, p2, k5
15) p5, ( k2, p3 )x 2, k2, p2, ( k2, p3 )x 2, k2, p5
16) k5, ( p2, k3 )x 2, p2, k2, ( p2, k3 )x 2, p2, k5
17) p5, ( t3f, p2 )x 2, t3f, ( t3b, p2 )x 2, t3b, p5
18) k6, ( p2, k3 )x 2, p4, ( k3, p2 )x 2, k6
19) p6, ( t3f, p2 )x 2, c4f, ( p2, t3b )x 2, p6
20) k7, p2, k3, p2, k2, p4, k2, p2, k3, p2, k7
21) p5, ( p2, t3f )x 2, t3b, t3f, ( t3b, p2 )x 2, p5
22) k8, p2, k3, p4, k2, p4, k3, p2, k8
23) p8, t3f, ( p2, c4b )x 2, p2, t3b, p8
24) k9, p2, ( k2, p4 )x 2, k2, p2, k9
25) p9, ( t3f, t3b )x 3, p9
26) k10, ( p4, k2 )x 2, p4, k10
27) purl
28) knit for 9 ½ inches, or until you can fold in thirds.
29) ( k2, p2 ) to end
30) ( p2, k2 ) to end
Bind off.
Fold in thirds seaming up the knit section sides, leaving the cable for the flap.
Weave in ends.
Add hooks or snaps to the corners of the flap and corresponding areas on the bag. Not pulling to tight as to disrupt stocking stitch roll of flap.
Button on center cable flap is ornamental and as such is
optional.

Thursday, December 17, 2009

Raven Tarot Bag


The Raven Tarot Bag is knit in one piece, no seams. It is started using the Eastern cast on ( optional ), then knit in the round until the cabled flap which is knit flat.

It's about 5 by 6 inches, fits my larger cards while wrapped in their cloth nicely.
I used size 6 US dpns ( set of five ), I've read that this cast on is easier with circular needles, I did not find it to be the case. I'm sure other toe-up cast-on's would work as well, I just find this one suites me. You could also seam the the bottom.

Cable needle
Gauge 4 ½ stitches by 7 rows per one inch
57 yards of worsted weight yarn

3 buttons, 2 smaller about ½ inch, 1 larger about 1 inch
Stitches that are used
I made this bag some time ago, I could not tell you how many photos were taken before we got some we could use ;)
buy now


Tuesday, July 28, 2009

The Four Toe Potbellied Drawstring Treasure Bag


The Four Toe Potbellied Drawstring Treasure Bag

Much easier to make then name ; ) Works great for using up your bits of yarn.

5 ½” by 6 ½”
19 yards of black
16 yards of purple
23 yards of blue
11 yards of burgundy
5 yards of mauve

All yarn used in worsted weight acrylic
Size 8US dpns
Exact gauge is not essential to this project


kf/b = knit into the front and back of the next stitch
sl 1 pw = slide one stitch purl wise
sl 1 kw = slide one stitch knitwise
yf = yarn forward
yb = yarn back
yo = yarn over the needle making a new stitch
k2tog = knit two stitches together
k2tog tbl = knit 2 stitches together through the back loop


Cast on 6 stitches
Kf/b all stitches ( 12 sts. )
Place evenly on four dpns ( if using circular needles place markers every 3rd stitch to show end of needles )
Kf/b, knit to stitch on needle, kf/b. on all needles
Repeat last round
Change to purple yarn
Repeat last round 3 more time ( 13 sts )
1) knit 5 rounds
2) * sl 1 kw, k12 * to end of round
3) knit 2 rounds


Change to blue yarn
1) knit
2) purl
Change to black yarn
3) k1, * sl 1 pw, k1 * to end of round
4) k1, *yf, sl 1 pw, yb, k1 * to end of round
Change to mauve yarn
5) knit
6) purl
Change to blue yarn
7) k2, * sl 1 pw, k1 * to end of round
8) k2, * yf, sl 1 pw, yb, k1 * to end of round
Change to black yarn
9) knit
10) purl
Change to mauve yarn
11) k1, * sl 1 pw, k1 * to end of round
12) k1, *yf, sl 1 pw, yb, k1 * to end of round
Change to blue yarn
13) knit
14) purl
Change to burgundy yarn
15) knit
16) p2, * yo, k2tog tbl, k1, p2 * to end of round
17) k2, * yf, k2tog tbl, p1, k2 * to end of round
18) p2, * yo, k2tog tbl, k1, p2 * to end of round
19) k2, * yf, k2tog tbl, p1, k2 * to end of round
20) knit
21) knit
Change to black yarn
22) k2, * yo, k2tog * to last 2 sts of round, yo, k2
23) knit
24) knit
25) k1, * k2tog, yo * to last 2 sts of round, k2tog
26) * k2, p2 * to end of round
27) * k2, p2 * to end of round
28) * kf/b, k5 * to last 4 sts of round, kf/b, k3
29) bind off loosely, weave in ends.
Drawstring cord
I made a I cord 1 yard long with the blue yard, using size 8US dpns for a good thickness.
Weave cord through the last round of yarn overs, going in at the beginning of round. Pattern is worked to leave a small area between the yarn overs for the drawstring, to add strength.

Friday, July 10, 2009

Lace Top Bag

Now add free pdf for purchase in my ravelry store


Lace Top Bag
I adapted a lace pattern called little arrowhead lace, for the opening of this bag. It’s in many pattern stitch books, including harmony guides and different sock books.

I just wanted to play with the lace pattern a little bit as well as trying a different way of doing increases. You do a yo then in the next round you knit in to the back loop of that stitch. I think it worked well.
10 yards Frosty Green Redheart worsted weight
16 yards Aspen Print Redheart worsted weight
34 yards Café Redheart worsted weight
Size 6 ½” by 7 ¼”
Size 8US dpns
Exact gauge is not essential to this project

Stitches
Kbl = knit through the back loop
Psso = pass slid stitch over
Yf = yarn forward
Yo = yarn over needle
K2tog = knit 2 together

Cast on 31 stitches with Frosty Green, join in the round.
1) k1, *yf, sl 1, k1, psso, k1, k2tog, yf, k1* repeat to end
2) knit
3) k2, *yf, sl 1, k2tog, psso, yf, k3* repeat to last 5 sts yf, sl 1, k2tog, psso, yf, k2.
4) knit
5) repeat 1 - 4
Change color to Aspen Print.
9 - 11 knit
12) *k5, yo* repeat to last st. k1.
13) *k5, Kbl* repeat to last st. k1.
14) *k5, yo, k1, yo* repeat to last st. k1.
15) *k5, Kbl, k1, Kbl*, to last stitch k1.
16 - 21 knit
Change color to Café.
22) knit
23) purl
24 - 26 knit
27) purl
28 - 30 knit
31) purl
32) knit
33) * k5, k2tog, * to last stitch k1
34) knit
35) * k5, k2tog, * to end
36) purl
37) * k5, k2tog, * to last stitch k1
38) knit
39) * k5, k2tog, * to last 3 stitches, k3
40) knit
41) * k5, k2tog, * to end
42) knit
43) * k2tog, * to end
44) knit
45) * k2tog, * to end

Cut yarn thread through remaining stitches, weave in end securely. Weave in all other ends. Make I-cord about 24” long, or to desired length. Weave through first row of lace yo’s cloeset to body of bag.


Tuesday, June 16, 2009

Hemp Soap Bag

I tend to knit things we need or want, this one is both. A hemp soap bag. Brent was always going on about the soap pieces in the tubs. So he needed the bag and I wanted to hush him up ; )

This one is made with one color, the pattern has two.
Gauge 5 sts by 6 ½ rows = 1”
30 yards of dk or worsted weight 100% hemp yarn. Pictured is Allhemp’s Foggy and Licorice in dk weight.
Needle sz. 6US dpns.
Crochet hook sz. I ( optional ) for drawstring.
buy now
 Ravelry for knit patten