Wednesday, May 16, 2018

Weaving sticks

 Awhile back I came across some weaving sticks in an outlet store.. while they looked neat, I couldn't see parting with the $12.00 ... on clearance..
I walked away with some nicely priced beads and didn't give it another thought.. well sort of... after getting home I told hubby about them.. he said go back and get them...

 sure why not..... at least look again....
    after all it is right next to Joann's craft store, so at some point I would be right there ;) .. came home with a stunning rose quartz piece that was begging to come home... along with the beautiful Amethyst I couldn't set down..

Third trip some time after that....same out come.. the stones were still calling..

Went back one last time and yep you guessed it... still came home with more stones instead of stick's..
what can I say they really wanted to come home with me... and felt so nice...
     and were way less than the sticks to boot ... altogether ...
by then the sticks were sold out... after that trip so were the stones ;) .. they are all quite happy here


 Fast forward a few weeks... I am working on the tapestry loom my guys made for me to practice embroidery on yarn and or with yarn.. 
faster than knitting a pair of fingerless gloves with more space.. not as easy to mess up etc.....

btw those gloves are still in the works, my skills are getting closer to what I want,
however now is not glove weather, well maybe driving gloves.. steering wheel getting a tad warm these days..  oh wait that's another story........
                            anyhow they are on the back burner for now..

                at that point I recalled those sticks.. I needed to make a set.. why didn't I think of that ages ago lol

 I had been given a packet of these bamboo sticks along with some craft supplies years ago.. they looked useful but had no clue what to do with them..


They are smaller than the ones I had seen and much more to my liking in price lol... now to make a set..

The points are not needed.. these are just what I had on hand
6 inch dowel sticks work great ( or cut longer ones to size wanted, I found this size easy to hold on to )


 got my tools together ...
 
be mindful to place in secure holding before attempting to drill..
 
 safety glasses are a must also.. take my word on this.. oh and watch out for smoke.. no clue they could light up so fast...
the holes are 1/2 inch from the bottom of the sticks, I wanted a bit of length to help guide the weaving over the yarn that goes through the sticks..
 
 side note ... I have seen some sticks with little eyelet screws on the bottom but felt the possibility for the weaving to stick would rise, I'm sure they would work with some thought put into the works.. but I wanted mindlessly easy here.. something that could be done while chatting or walking along 


these are the finished product ... after a good sanding of course 


   After giving them a try I added a few more
 

And a few more..
 
These are so much fun, super easy..
 
to start to weave a length of yarn twice the length need, plus about 6-8 inches for tying off ( longer for fringe ), through each stick,
 you can put a loose knot at the end of each or tie them loosely together to keep things in place..
 put a slip knot around the first stick and start weaving up the sticks..
as they fill up side them down on to the yarn threaded through the sticks ( this is call your warp yarn )
 
be careful to keep a bit of weaving on the sticks to keep things looking smooth..
when you get to the size wanted slide all the weaving down even out among the warp yarn..  
 tie off.. you can weave the ends in or leave as fringe
 
 
I am going to use the pieces I made to hang earrings on at market.. come cooler weather I plan on making scarfs.. and such..
 

Saturday, April 14, 2018

Sashay yarn ponytail holders

 
I was gifted a rather large box of Red Heart Sashay Boutique yarn among many other brands of similar yarns.. I made a couple of scarfs with it..
while they claim to work up fast, that was not my experience
  it never failed that I would have to set it down and walk away.. pick them up and pull the stitches out .. ugh.. way too much effort for an item that wasn't selling anymore..
 
I got so tired of it I used many skeins as bulky yarn and crocheted it on an Q hook.. looks cool enough but takes a lot of yardage
I still had dozens of skeins left.. many just a single skein of each color.. not enough to make a bulky scarf or ruffled for that matter, some of the colors just didn't go together well enough to use on one item
 
I had seen how ponytail holders were being made from them.. but they were always finished off in my opinion.. rather sloppy..
Pulling the whole yarn through the last stitch and just leaving the end hang loose.. or tied in a big knot ..
both of which come undone with wear..
 
I just didn't like the look.. plus I dislike making anything that can't stand up to wear ..
truthfully one of the big reasons I dislike the ruffle scarfs patterns out there as well, if you pay for an handmade wearable item it should hold up for at least a washing..
I just don't like it..
 
I don't wear my hair up ever.. so the though of the ponytail holders passed pretty fast lol..
Until my sister came over wearing one.. with ends tied together.. making a pretty item look half done..
 
ok fine time to make a few..
if nothing else something to put on the table for market.. or a quick gift
 
I have sewn the ends of all of the ruffle scarfs I made in the past.. with the end kind of tucked under itself.. another reason they took me longer ;)  I'm telling ya I don't like loose ends LOL ..
 they still didn't look great to me..
 
with working in the round I hoped seaming them together would give it a more "finished" look
 
 
Sewing thread was too thin to do a good job..
crochet thread size 10 however works great..
 
I have many colors to match up with the Sashay yarn but not quite enough..
so embroidery floss for those.. ( 3 strains not the full 6 )
 
takes more time to sew them than to slip stitch around elastic band.. but worth the effort..


 I used about four yarns of Sashay yarn, size H8/5.00mm hook to slip stitch each..
some yarns looked better with less.. some more..
I just worked until they looked full..

 
Next I seamed the ends together.. after tying the end of the thread or floss I was using to seam with to the last slip stitch "live" loop .. I sewed a few stitches around that slip stitch just to be sure it wasn't coming undone..
 
 making sure to "capture' all of the loose ends ... I tucked them in a bit as I seamed.. making sure not to get too bulky
 
  I also trimmed of the longer edge of the Sashay yarn so it would sew up evenly.. and not hang lower


that was it.. nice and smooth.. no worries about hiding the knot under the ponytail .. not as fast as other methods I am sure but hopefully they hold up well... now to get someone to try them out and maybe even a photo with one in use


Wednesday, April 11, 2018

Dragon Scale Baby Booties Crochet pattern


                               Dragon Scale Baby Booties


I have been wanting to make a scale bootie pattern for ages now..
I finally put aside the time to do it.. newborn and 3 month sizes.. lots of photos.. written in American terms.. worsted weight yarn.
 

Now through April 30 2018 ( midnight mt time ) use coupon code BOOTIES to get pattern for only one dollar , be sure to add code before checking out as there are no refunds or returns.. only on my Raverly store
  click here


Thursday, April 5, 2018

Quick Crochet Fingerless Gloves


Quick Crochet Fingerless Gloves

Written in American terms

Fits 7.5 inches around, 6 inches long

Hook size US H8/5.00mm
77 yards of  worsted weight yarn, pictured in Red Heart's With Love Pewter .. this yarn tends to run on the heavy side of worsted weight yarns, using thinner yarn such as Caron Simply Soft will give you a smaller glove without changing the pattern
Gauge
First 4 rounds = 1.5 by 7.5 inches

Stitches
ch = chain
hdc = half double crochet
sc = single crochet
sc2tog = single crochet two stitches together

Notes

Both gloves made the same.
Every round starts out with a chain 1, this does not count as a stitch, hdc in same place as starting chain.
Every round is joined with a slip stitch. All rounds are worked in the round so do not turn.

Read notes before starting pattern.

1) ch 22
2-4) hdc 22
5) hdc twice in the first 2 stitches, hdc 20
6) hdc twice in the first stitch, hdc 2, hdc twice in the next stitch, hdc 20
7) hdc twice in the first stitch, hdc 4, hdc twice in the next stitch, hdc 20
8-10) hdc 28
11) hdc 1, skip 6 stitches hdc 20
12) hdc 1, hdc around "joining" stitch over thumb opening, hdc 20
13) hdc 22
14) hdc 22, after join do not cut yarn unless no trim is desired.

Trim
 ch 1, sc in the same space, * ch 3, skip 2 stitches, sc in the next* repeat * * to end, join with first sc, fasten off.

Thumb
1) join yarn on any thumb opening stitch, ch 1, sc in the same space, sc around to first stitch, join
2) ch 1, sc to the last 4 stitches sc2tog twice, join
3) ch 1, sc in same space, ch 1, skip 1 stitch sc 1* repeat * * to end, join with first sc , fasten off, weave in ends.

any items made with this pattern may be sold

 PDF can be purchased here

Wednesday, April 4, 2018

First weaving Done

 
My frame weaving loom worked quite well... my weaving skills are lacking
 clearly lol.. the goal was to just whip one out so I could practice embroidery on yarns works for that it was perfect .. I left it on the loom instead of placing it on a hoop.. nice and easy
 
 
I love the look.. and it was so much fun to do.. now that I have made one I want to make more.. so the next step is to weave faster.. I am using a dowel stick to lift half of the warp lines.. makes it much faster going one way
 
 but going back is a bit slower.. as each line had to be wove by hand.. the long needle does help.. however I would like to make a few other things with it.. at a faster rate.. 
side note have you seen scarfs wove out of Lions Brands Mandala ... just wow ...


working on making a heddle out of popsicle sticks.. ok craft sticks.. way smaller than the ones I recall as a kid lol.. in this application the size is perfect.. picked them up at the dollar store, a penny a piece .. a bit of sanding is in order.. as I need 80 plus I pulled out my rotary tool for the job.. hopefully it works out... I so want one of those scarfs..  


Got to work on my next pair of flip flop slippers a bit today.. still a long way off.. next pattern Dragon Scale Baby Booties sizes for newborn to six months coming up soon


Friday, March 23, 2018

what's been on my hooks

Got another c2c done.. well half of one lol... had an order for a shawl.. tried at least 5 other patterns.. just wasn't feeling right.. set it aside to rethink it yet again
picked up the c2c I've been working on here and there.. the second photo.. more on that in a second..
I hit me right away.. it would work using a c2c stitch.. I love the cozy feel of it.. took one skein of reddish orange,  2 skeins of green and one light purple all Simply Soft by Caron, on a size J/10-6.00 mm hook.. have about 60 hours tied into it.. so much for c2c being fast lol.. really it did go quick once I picked the right pattern.. close to 200 squares of 3 dc's and a ch3 across the top.. didn't get the measurements, almost forgot the photo.. wove in ends sitting in the van just before handing it off lol 


This c2c I started to use up the older yarn I have been gifted.. going to take a few more of them to get it used but we get a nice cozy warm blanket out of it and the yarn doesn't get wasted.. after waiting all those years it would be a real shame not to use it right..  :D


this wrap was also created to use up some of the "funky" yarns I have been gifted.. also to learn new techniques.. this is what got me thinking about weaving again.. The body is crocheted with a large hook.. Q 15.75 mm using super bulky chanel yarn.. thinner yarn is than woven in between the stitches.. no clue what kind of yarn that was.. didn't have a label on it.. it goes from thick to thin and is on the fuzzy side.. I used eyelash for the crocheted over laid stitching.. and another type of chanel ( dark blue and thinner ) for the embroidered roses... I added a trim of fuzzy/metallic along all edges.. the fringe is of the woven yarn and some blue super saver I had that matched..

I learned a lot of new skills and used a lot of yarn I had no clue what to do with  ... now to add taking a good photo to my list of thing to do..  like I haven't been trying for years   lol
It really did come out nicer that this makes it look.. Really

 
Yet another project I'm working on.. got them ready for yarn.. hopefully they will see my feet some time soon ;)
 

Wednesday, March 21, 2018

Funky flowered fingerless gloves

Been seeing the prettiest flowered fingerless gloves going around online lately.. true works of art..
I want a pair for myself but no way can I toss that kind of cash at them right now, even though they are more than worth it..
will have to make my own..
I have never embroidered with yarn.. dang it's been a good thirty years since I have with floss.. I cross stitch every few years, while there are some similarities the skills needed for each are as different as knitting and crochet.. sure you can get a sweater from each using yarn.. you get my drift ..right

So touching up on embroidery skills is a must.. but I have this list of things I want to do.. I can get lost in all of the patterns I want to try or make with ease.. a crafting list is a must
 
Funky Flowered Fingerless gloves have been on that list for awhile now..
 
the plan was to make different flowers, learning new skills as I went along..
very close to what is needed to make the others.. only these are to be bulky, bold, wild flowers with no rhyme or reason.. not classy and stunning... lol
 
I had planned on a black set of gloves..  
but that would take time to make ..
 I didn't want to wait..
you know how it is when you have to try a pattern or new skill..
NOW
yeah like that..
 
I look over and see a pair of gloves I put together to make a pattern customer happy.. she wanted extra long thumb gussets..
these were nothing I was going to put out for sale or even use myself as they were a bit too big..
 
due to this I had grabbed multi colored yarn I was gifted.. because it was close..
I really wanted to get it over with.. I had a ton of orders to get done..  it was a free pattern to begin with..
 I had tried explaining how to go about it with no luck.. hope she was happy with the make over.. never heard back from her come to think of it
 
so why not use them instead of letting them sit any longer..
 
Now if you start with gloves in purples, pinks, grays and browns you can pretty much figure funky is defiantly in the cards.. right
 
 
I had no care what the colors of the flowers were..
 just grabbed out of my jug of small yarn balls and went for it
 
 
                                                with this added in funky got a tad crazier..
I tried every kind of flower and leaf I felt like.. no rhyme or reason at all yep..  it shows LOL...
I learned so much.. They are down right ugly .. didn't bother weaving in ends just tied them off.. the extra yarn made them fit better... you know what they are so frigging comfy I am shocked..
                                                                    I LOVE THEM


Ok with that out of my system it was time to get down to business ..
learning even more stitches and how to do them on yarn properly instead of such a mish mash..
 
I made a short pair of fingerless gloves ( pattern to come soon ) and put yucca's on them .. our state flower..   
 
I used Lion Brand Homespun.. not sure of the color way as it was gifted to me without the label, but to me it has the look of a New Mexican sunset ..
that and I didn't have any black yarn.. can you believe it.. I had small ball of it here and there, none matching and not enough to even make this short of a glove.. ugh
They worked out pretty good though
still not what I'm looking for so onward
 
 
Something else on my crafting to do list was putting together a simple weaving loom..
frame style..
I used to make rugs years ago before we got Little Dog and she decided that every rug was her personal potty mat :(
 
Have always wanted to weave some bags and wall hangings..
why not do it now and practice weaving and embroidery at the same time..
 great way to use up some of the older yarn gifted to me..


I picked a off pinkish almost sandy color for the background ( weaving ) part..
if you live or have visited New Mexico in the spring you know this is the color of the sky for at least part of most days ..
 for the rest of you think high winds with sand mixed in yet some how the sun shines through..
 
All of our flowers are now getting set to bloom..
 so here's my start of Spring Flowers in New Mexico.. 


                          I have no clue where I'm going with this.. I'm just along for the ride lol

Tuesday, March 13, 2018

Filet Crochet Cross Chart


Filet crochet has been on my "to learn" list for ages now..
 this is my first go at making my own ..
started out simple..
with time allowing I hope to get more complex designs going although I plan on keeping them to a smaller size..
 we'll see how it goes..
                                                             not pressed in this photo

I then added a few leaves a vine and a rose, after putting a single crochet overlay around the cross..


I used a size US B1/2.25mm hook and size 10 crochet cotton thread.. each block is 3 dc's ( last on counting as the first in the next ).. it can be used in other counts.. however you like.. I had learned this method with a bookmark I had just done so gave it a whirl.

Thursday, February 1, 2018

Lemon peel hood

Still playing with the lemon peel stitch.. put together this quick hood


Super easy .. this one is child sized..


Gauge is not essential

size can be changed by sticking to a even count of foundation chains plus one turning chain, adding as many or few rows as you like

Written using American terms

Worked in the Lemon peel stitch = sc1, dc1 every row ( a known stitch pattern )
Use any yarn you like with corresponding hook size... I used worsted weight ( a bit on the light side of the scale though ) and an I/9-5.50 mm hook


Stitches

ch = chain

sc = single crochet

dc = double crochet


1) ch to the length needed ( make sure it's a odd number ) .. from middle of the back od head, where seem will be to the front edge around face.. with mind I added a couple of rows of dc's after seaming if you choose to do so adjust length accordingly .. mine was 29 stitches

2) sc into second chain from hook, dc next stitch continue with sc one, dc one to end 

3) chain 1, *sc 1, dc1* repeat to end of row 

repeat row 3 until you reach the size you want folded in half

seam up the back

add two rows of sc around the front edge

I did the ties using a size Q hook with three strands held together, chained 25 and fasten off

fasten off weave in ends


Tips

each sc will have a dc worked in it, as each dc will have a sc worked in it

you will always end row with a dc 

Monday, January 22, 2018

scrap yarn ends

From my first knitting project I have been saving all of my tail ends of 2 -12 inches after weaving in.. anything longer gets added into other projects
 
I tie them together and roll in to small balls to be add to the larger one later on.... as the large one now weights a few pounds so I don't keep it in my yarn bag any more.. tried just keeping the scraps in a bag but after tying them for a whole day I thought tying as I am weaving un ends and joining them together later was the way to go lol

This is my second large ball of knotted yarn ends..  the first I used after one year of saving them
I made them into a scrap wrap couple of feet wide and some where near six foot long
 
I would get stopped every time I went out wearing it.. how did I do that where can they find yarn like that.. even offers to buy it..
clearly the photos here are not doing it justice..
after getting stopped so many times it was starting to wear on husbands nerves, who is not a fun person to take shopping at the best of times .. I decided to hang it over one of our windows..
at least we got to sit down when answering the questions this way ;)
 
it stayed in that job for years in one form or other, sometimes on the couch or chair, then back to the window..
until the few scraps of wool caught the eye of a moth.. :(
ate through it in a few places..
I repurposed it into a doggie blanket for it's last few months..


I still haven't picked a pattern for the next ball but should have enough to cover a rather large window at this point lol


I joined a couple crochet groups on Facebook awhile ago to see what the rest of the crafters were up to..
love it.. the sharing and good spirits of helping each other is so wonderful ..
one of the things I see shared often are crocheted graphs.. over the top amazing works of art
 
Now it has been ages since I knit using a simple graph..
never even tried it with crochet..
also never tried c2c...
 
add on the fact that I was given so much yarn, in the last two years, that were either small amounts of leftovers or very old.. Ok have to go into a side note here.. this could really be a post of it own lol
 
I am a big fan of old acrylic yarns.. they hold up so well, and some make the best scrubbies.. still have a shawl my mother made me over 30 years ago in great shape..
 the yarn that is suitable for scrubbies has been set aside as a rare find these days I am not willing to part with any of it lol
 
check out some of these labels .. we are talking yarn from the 80's
How cool is that :D


on the inside is a date of 87


I haven't even heard of some of these before..
 
I wanted to do something special with these.. someone held on to them for decades keeping them clean and safe..
 
then it hit me I knew what I wanted to make
 
We lost our Chillie last month, just after his 21 birthday..
 
 
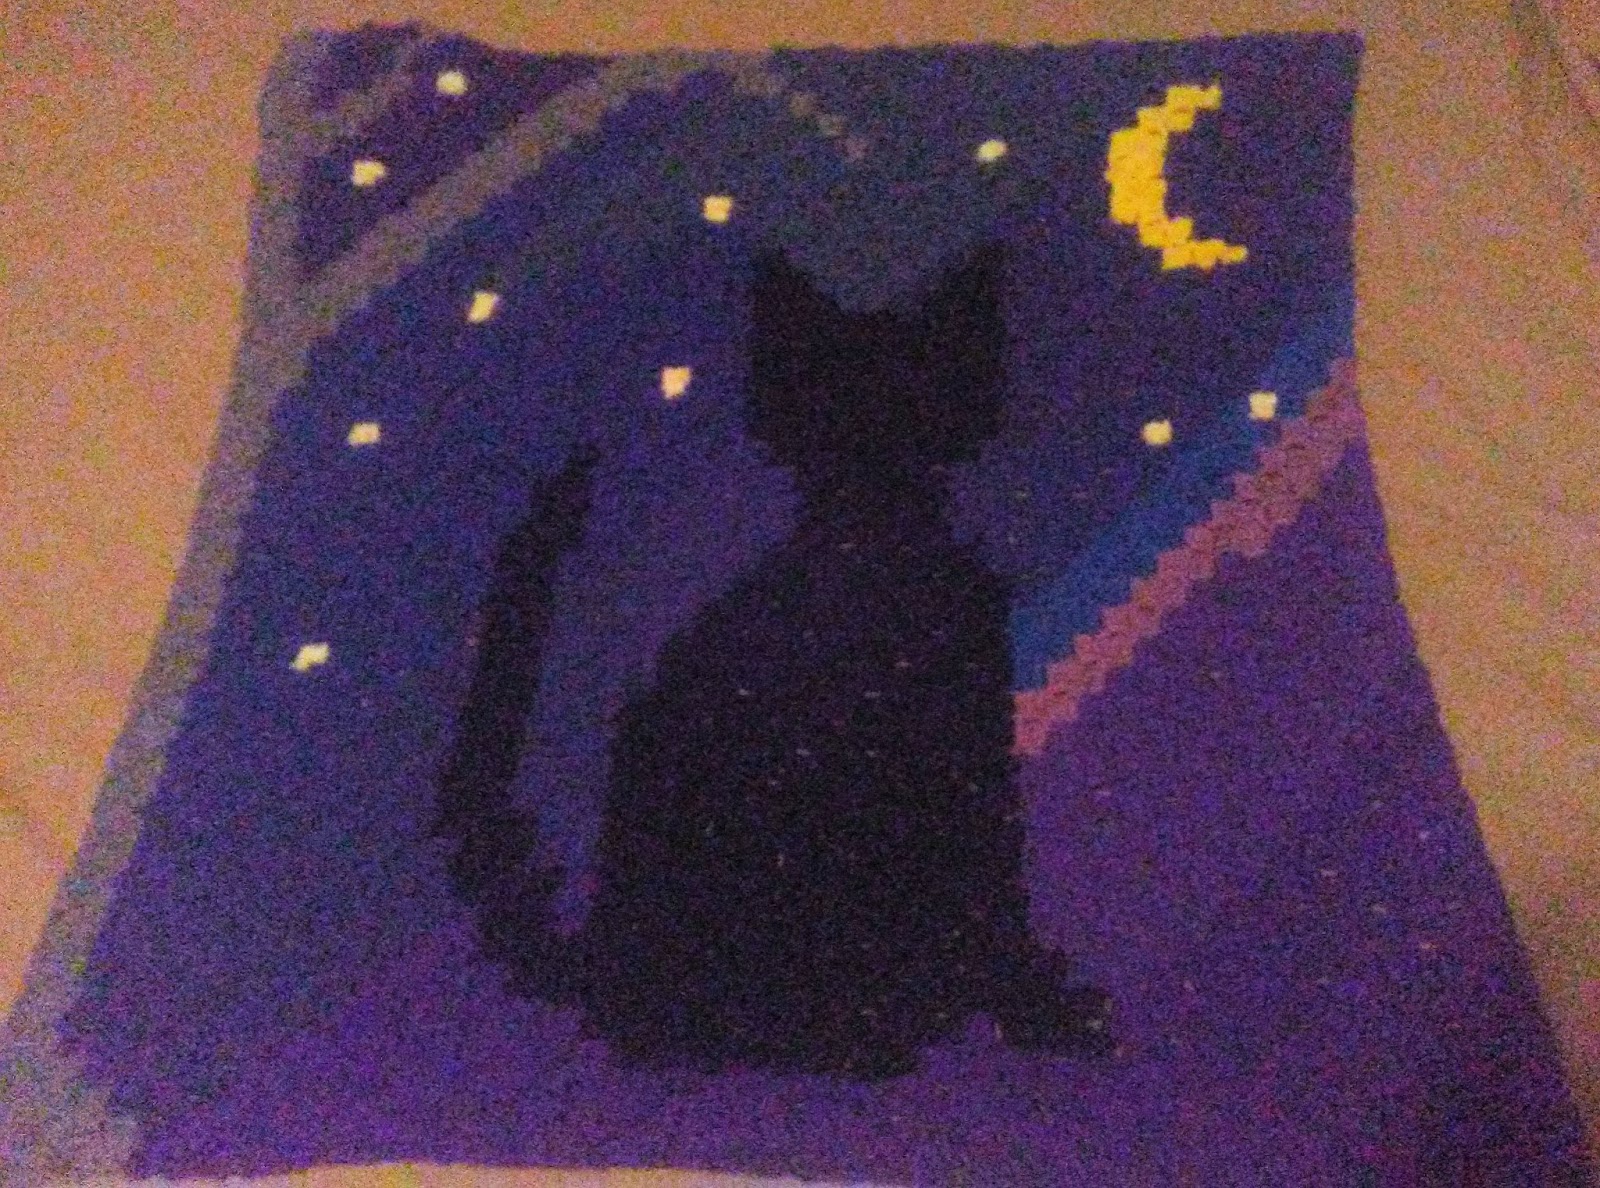
I made my first c2c scrapgan in his honor...
he spent the last few years of his life living it his way..
flat out would not come in except when we could forced him to.. he's some how find a way out within a day or so.. he never left the yard, spent most of his time hunting mice in the garden or enjoying the catnip planted for him.. I made him come in during storms if we could catch him.. he would make it easier when he knew the forth of July or New year was coming.. but not Halloween.. and that was a must be in time for a black cat.. this last year he didn't fight came in on his own.. still got out two days later lol...
I'll post the graph and colors later on

 
I got a bit emotional talking about Chill forgot to include why the scrap ends and the graph tied in...
being the first I've made I was learning as I went along..
 not having a real plan in mind other than a shadow of a black cat with some kind of background .. I just grabbed colors and worked it in as I went..
we live on the side of the Organ mts. and sat out there with Chillie watching the moon rise often .. he would sit by one of the trees ( so we couldn't catch him lol )
after all of the switching of colors to get a changing night sky look I had 150 ends to weave in..
I still need to add a border so there will be a few more.. all added to my now even bigger scrap ball
 
give your fur babies a hug for me and Chill