Saturday, May 31, 2014

Crochet headband with beads revisited

I picked up some cool beads on clearance the other day... light weight acrylic, great for adding to knit or crochet items... the 3 colored headband needed to be revisited the original pattern can be found here
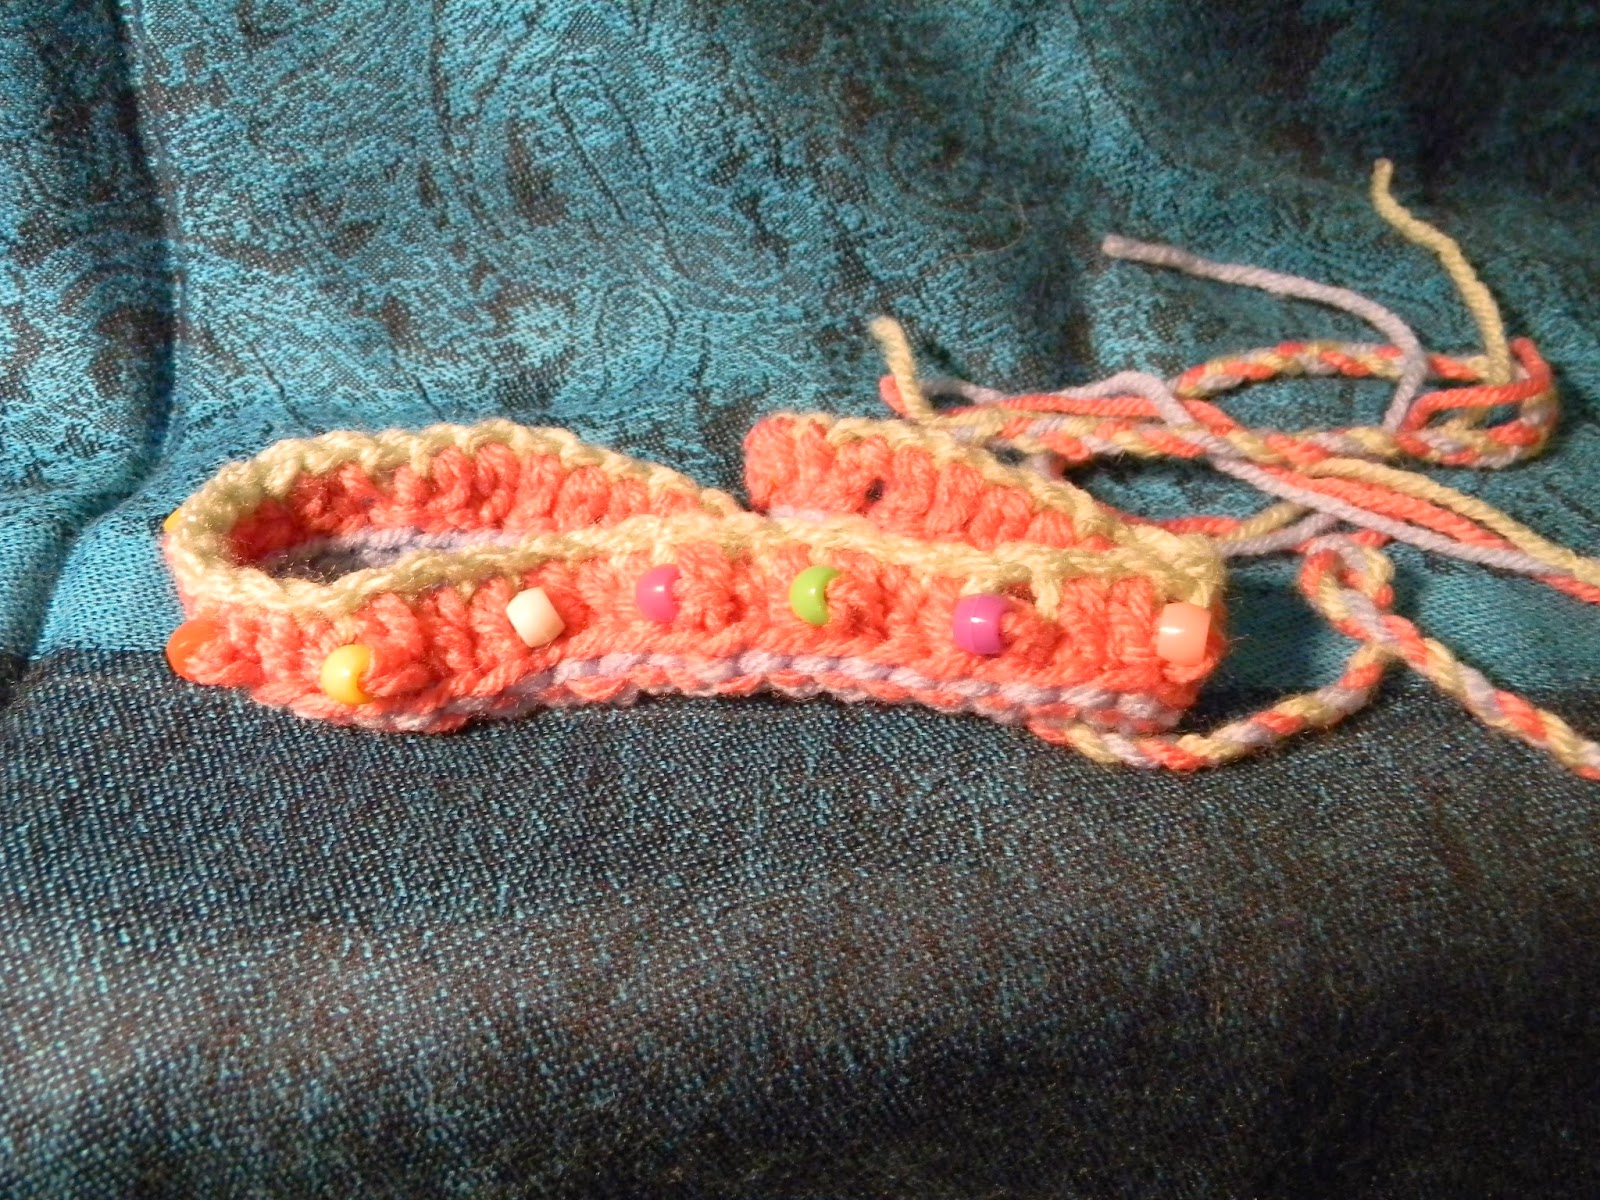
crochet 3 color beaded headband

with this one I used 2 colors instead of three, using the same color for rows 1 and 3 ( still cutting the yarn for braiding ). I also changed the bead placement as these are bigger adding one every forth dc in the second row... I changed the last row a bit... fasten off the second row.. turn the headband so the right side is facing you and slip stitch through both loops to the end

Thursday, May 29, 2014

Small Dish Cloth # 1

I find that large dish cloth though they work great for something do not work very well in tight spaces, like inside small glasses... I've been making just straight knit stitch ones for ages now but wanted to have a bit of fun with a few...
 
 
unblocked in photo

Small Dish Cloth # 1

Size 8 US needles
21 yards worsted weight cotton yarn
5 by 5 1/2 inches approximately
Exact gauge is not essential to this project

k = knit
k2tog = knit 2 stitches together
p = purl
psso = pass slid stitch over
sl 1 = slide one stitch purl wise
yo = yarn over needle
* * = repeat instructions between as many times as indicated

Cast on 21 stitches

1 - 6 ) knit

7 ) k3, *yo, k2tog*, to last 2 stitches, k2

8 ) k2, purl to the last 2 stitches, k2

9 ) k2, *sl 1, k1, psso, yo * to last 3 stitches, k3

10 ) k2, purl to the last 2 stitches, k2

11 ) knit

12 ) k2, purl to the last 2 stitches, k2

13 - 19 ) knit

20 ) k2, purl to the last 2 stitches, k2

21 ) knit

22 ) k2, purl to the last 2 stitches, k2

23 ) k2, *sl 1, k1, psso, yo * to last 3 stitches, k3

24 ) k2, purl to the last 2 stitches, k2

25 ) k3, *yo, k2tog*, to last 2 stitches, k2

26 ) k2, purl to the last 2 stitches, k2

27 - 32 ) knit

Bind off weave in ends.

The Bat seed bead earring chart


Monday, May 26, 2014

Granny Square Wrap


Awhile back I found this bag full of granny squares at a thrift shop... I love granny squares and being new to crochet I thought it would be good practice to make more squares and make a throw or whatever.. 


 I got to work using up a lot of my scrap yarn :D


I decided I wanted a wrap... hey you can never have too many wraps and shawls lol


I did a single crochet stitch to join them length wise and sewed them from the back width wise... I added one and three quarter rows of single crochet trim with a shell stitch on the bottom edge.

I have many squares "left over" so they will become scarfs for those in need.
  

Friday, May 9, 2014

Crochet 3 color headband with treble crochet stitch

Note: the only difference between this pattern and my crochet 3 color headband pattern is the stitch used for the center row ( and yarn )...for easy of choice I added both
 

Crochet 3 color headband with treble crochet stitch

Adult size ( easily made to any size )

Size I/9-5.5 mm hook

Exact gauge is not essential to this project

Color A 3 ½ yards worsted weight approximately

Color B 11 yards worsted weight approximately ( Caron's Simply Soft Party in Royal Sparkle )

Color C 3 ½ yards worsted weight approximately

ch = chain stitch

tr = treble crochet

sl = slip stitch

1 ) using color A, leave 16 inches or so for tie, ch 50 ( or about 3 inches short of length to go around head ) turn

2 ) change to color B ( cut yarn A leaving a 16 inch tail of both colors ) ch3, tr into back loop to end, turn

3 ) change to color C ( cut yarn B leaving a 16 inch tail of both colors, giving you 3 tail strands ), sl into front loop of chains to end, fasten off leaving 16 inch tail.

Braid 3 tail strands on each side to make tie, knot at end.

Thursday, May 8, 2014

Crochet 3 color beaded headband


Crochet 3 color beaded headband

Adult size ( easily made to any size )
Size I/9-5.5 mm hook
Exact gauge is not essential to this project
Color A 3 ½ yards worsted weight
Color B 7 yards worsted weight
Color C 3 ½ yards worsted weight

bead amount varies with size of headband

ch = chain stitch
dc = double crochet
sl = slip stitch

1 ) using color A, leave 16 inches or so for tie, ch 50 ( or about 3 inches short of length to go around head ) turn

2 ) change to color B ( cut yarn A leaving a 16 inch tail of both colors ) ch2, dc into back loop to end, adding a pony bead to every third dc starting with the second one, turn

I added the beads on as I went along using a smaller hook to pull the yarn through… see photos at bottom of pattern.

3 ) change to color C ( cut yarn B leaving a 16 inch tail of both colors, giving you 3 tail strands ), sl into front loop of chains to end, fasten off leaving 16 inch tail.

Braid 3 tail strands on each side to make tie, knot at end.


Place one bead on yarn by using small hook to pull the yarn through, place the loop on working hook


Continue with dc keeping bead in front


I got some nice acrylic beads and decided to make another headband... I changed the pattern up a bit... changes can be found here 

Crochet 3 color headband


Crochet 3 color headband

Adult size ( easily made to any size )

Size I/9-5.5 mm hook

Exact gauge is not essential to this project

Color A 3 ½ yards worsted weight

Color B 7 yards worsted weight

Color C 3 ½ yards worsted weight

ch = chain stitch

dc = double crochet

sl = slip stitch

1 ) using color A, leave 16 inches or so for tie, ch 50 ( or about 3 inches short of length to go around head ) turn

2 ) change to color B ( cut yarn A leaving a 16 inch tail of both colors ) ch2, dc into back loop to end, turn

3 ) change to color C ( cut yarn B leaving a 16 inch tail of both colors, giving you 3 tail strands ), sl into front loop of chains to end, fasten off leaving 16 inch tail.

Braid 3 tail strands on each side to make tie, knot at end.
 

Deviled chicks

We've been getting a fair amount of eggs each day now, so for Easter this year I decided to make deviled chicks...  


They are a bit trickier than standard deviled eggs that are just cut in half and filled, but so worth it :D

I knew I wouldn't be putting paprika on the top so I spiced them up a bit more than I usually do...
The eyes are bits of black olive, beaks are carrots.. to make them stand I cut the bottoms flat.... placed in a bed of home grown greens... they didn't last long... next time I may have to make a few more :)